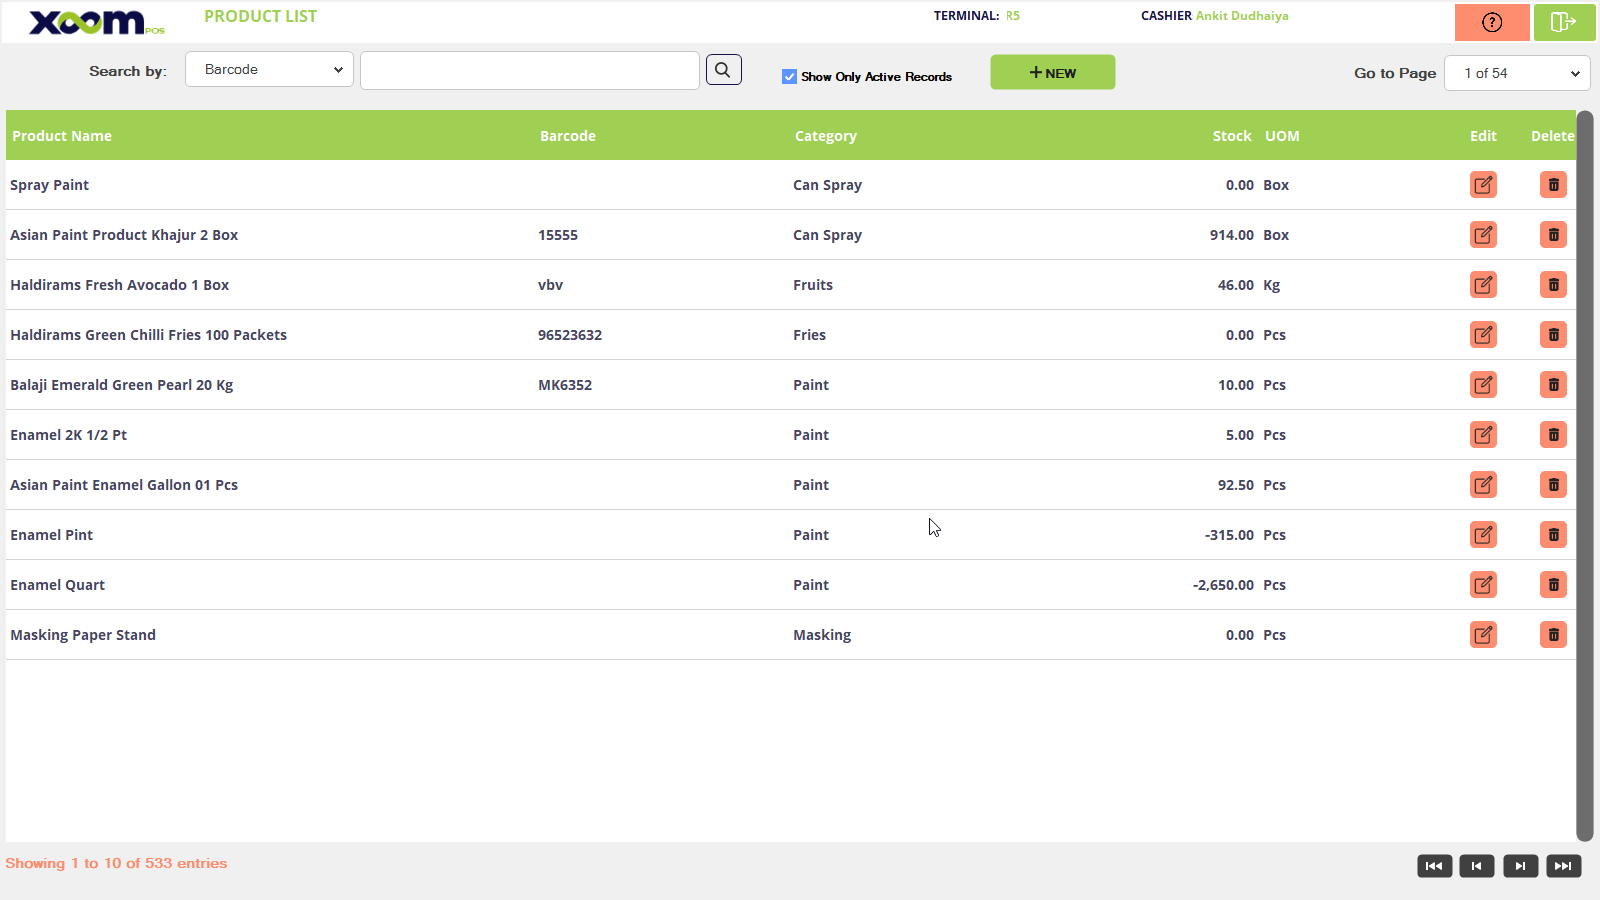
The product Master module will manage all the added products.
Click on the Product Master and you will be redirected to the Product Master screen. Please refer to the below screenshot.
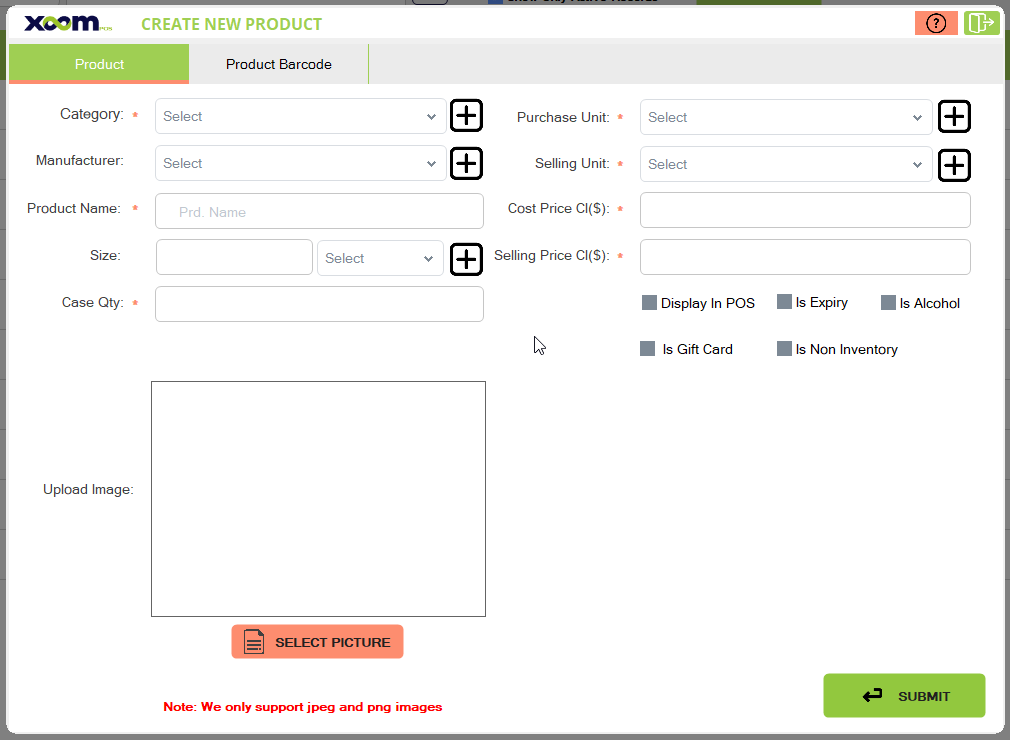
To add a new product click on the ‘New’ button, a popup will open where you need to select the category(if you want to add a new category then by clicking on the + icon you can add the new one and select it), select manufacturer, add the product Name, select UOM, purchase unit, sell unit, cost price, selling price, case quantity, select image. Please refer to the below screenshot:
Here 4 checkbox options show, 1st is ‘displayed in pos’ means if you select this then this product is displayed on the pos sell screen.
If you select ‘Is Alcohol’ then this product is counted on alcohol and at the specific time, it’s going to sell.
If you select ‘Is gift card’ then this product is the gift card.
If you select ‘Is non-inventory’ then the stock is not managed for that product(eg., carry bag).
If you click on the ‘Submit’ button then the product is submitted and redirected to the ‘Multiple Bardcode’ side tab.
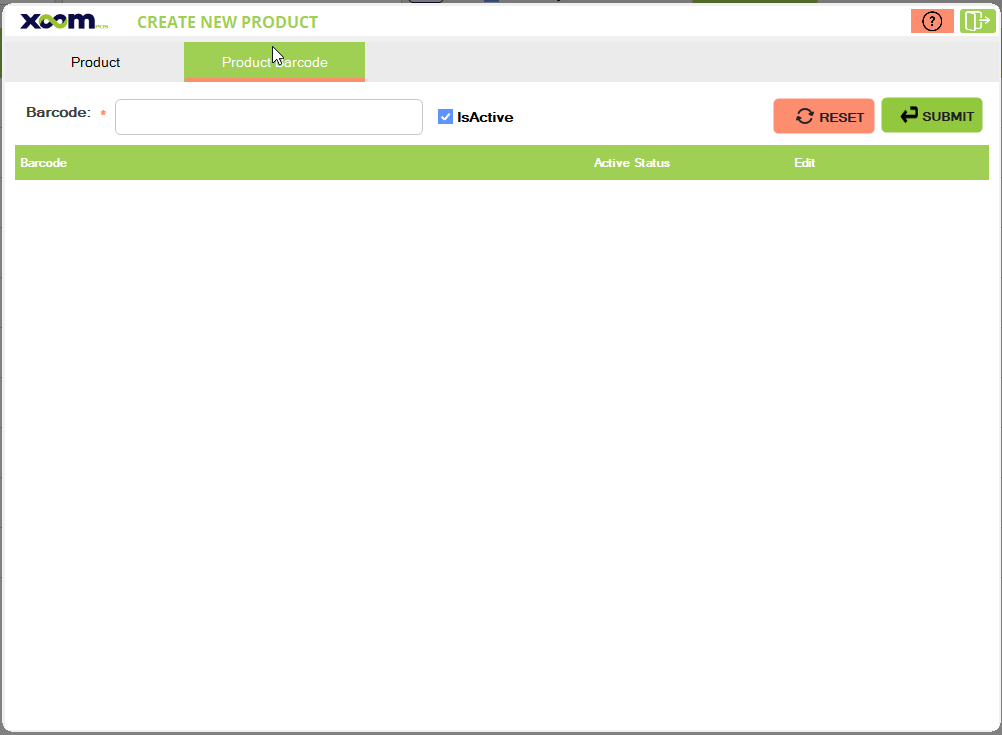
Here you have to add a new barcode for this product, below is the screenshot for your reference:
In multiple barcode tabs, you can see that the barcode field shows.
You can scan barcode printed on products.
After clicking the ‘Submit’ button the barcode of the product will added and if you click on reset then the entered barcode on the field gets cleared.
ISActive means the barcode is active else cashier is not able to scan the barcode for this product.