A terminal master is used to view the terminal details.
Click on Terminal Master from the Back office and you will be redirected to the Terminal setup screen. Please refer to the below screenshot:
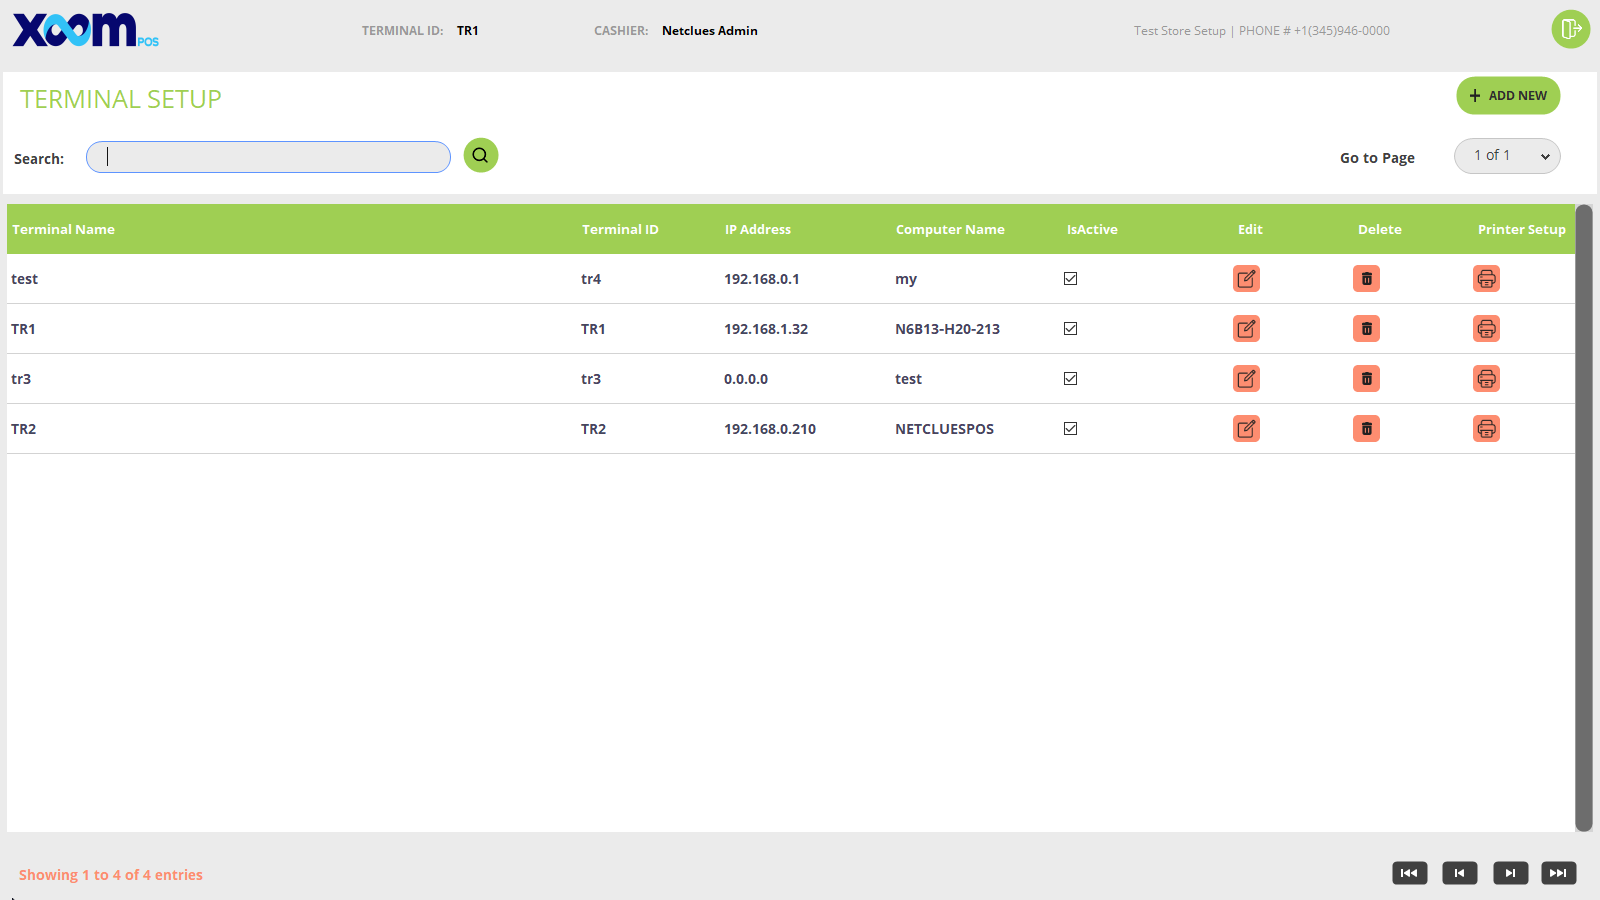
You will be able to see the list of terminals in tabular format.
You can search the terminal by terminal name and id.
By clicking on the icon you will able to edit the terminal detail.
By clicking on the icon the terminal goes to soft delete(only deactivate).
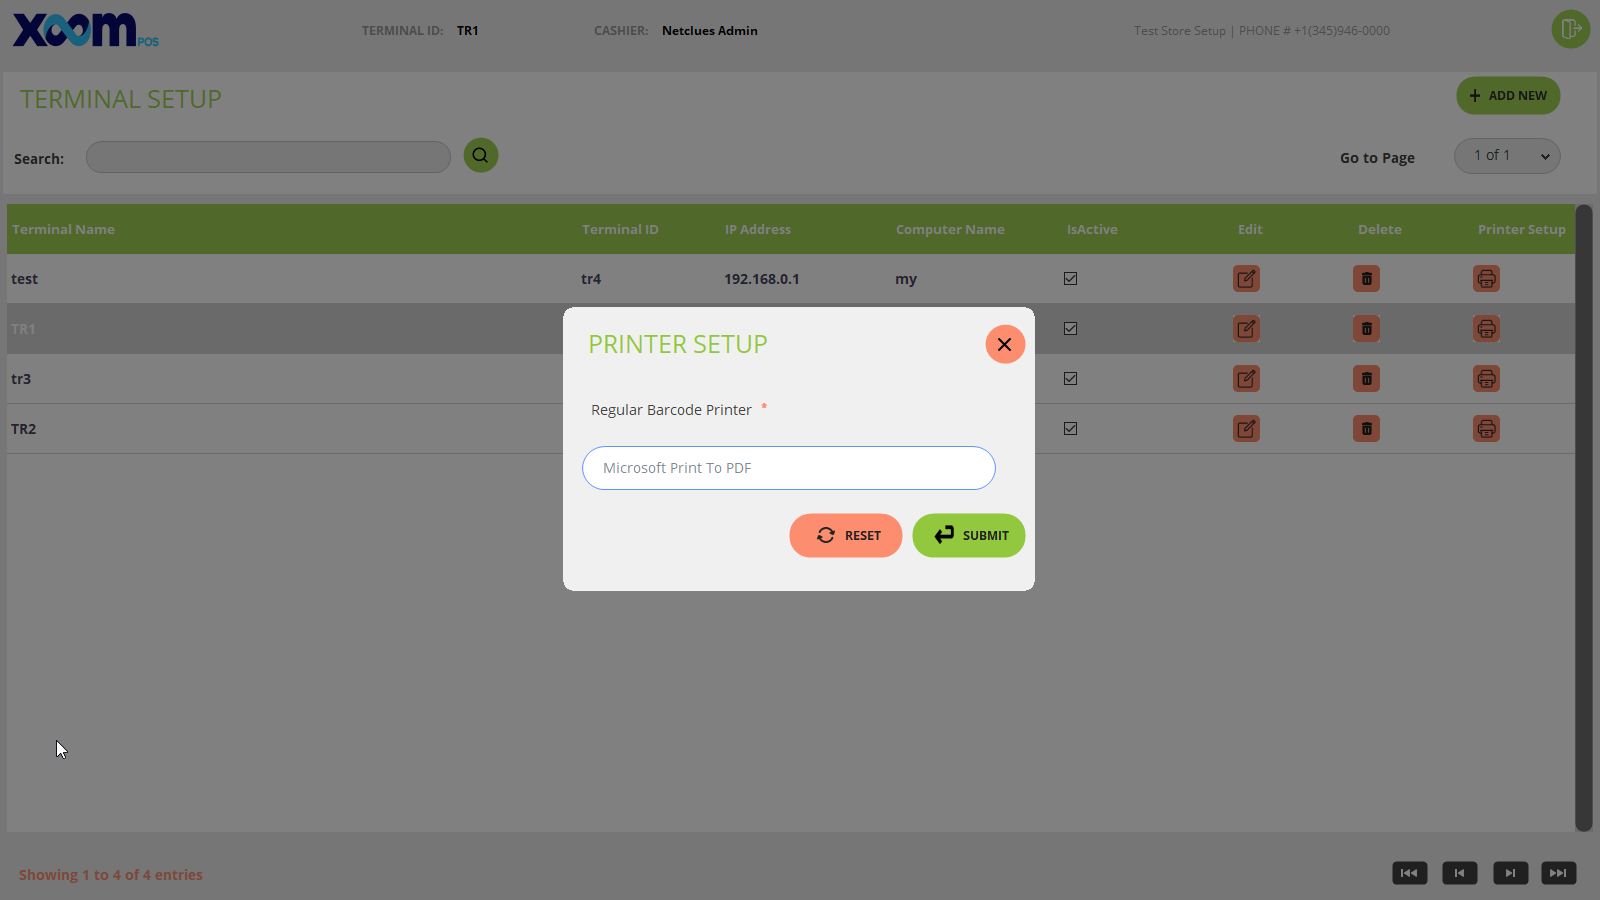
By clicking on the printer setup icon it shows a printer setup popup screen will shows and below is the screenshot for your reference:
On the regular barcode printer field, we need to add the printer name which is attached to the terminal.
If you want to add a new terminal then by clicking on the ‘Add New’ button terminal detail popup will appear and fields like terminal name, ID, connection port, trigger command, report printer, receipt printer, computer name, label printer, and IP address shown with active inactive checkbox. Below is the screenshot for your reference:
After filling in all the required fields and clicking on the ‘Submit’ button new terminal is going to be added successfully with a success message.
If you click on the ‘Reset’ button then the pre-filled fields get reset.